Schema discovery
Review the tables Queringo found and control what the AI can see, with PII masked by default.
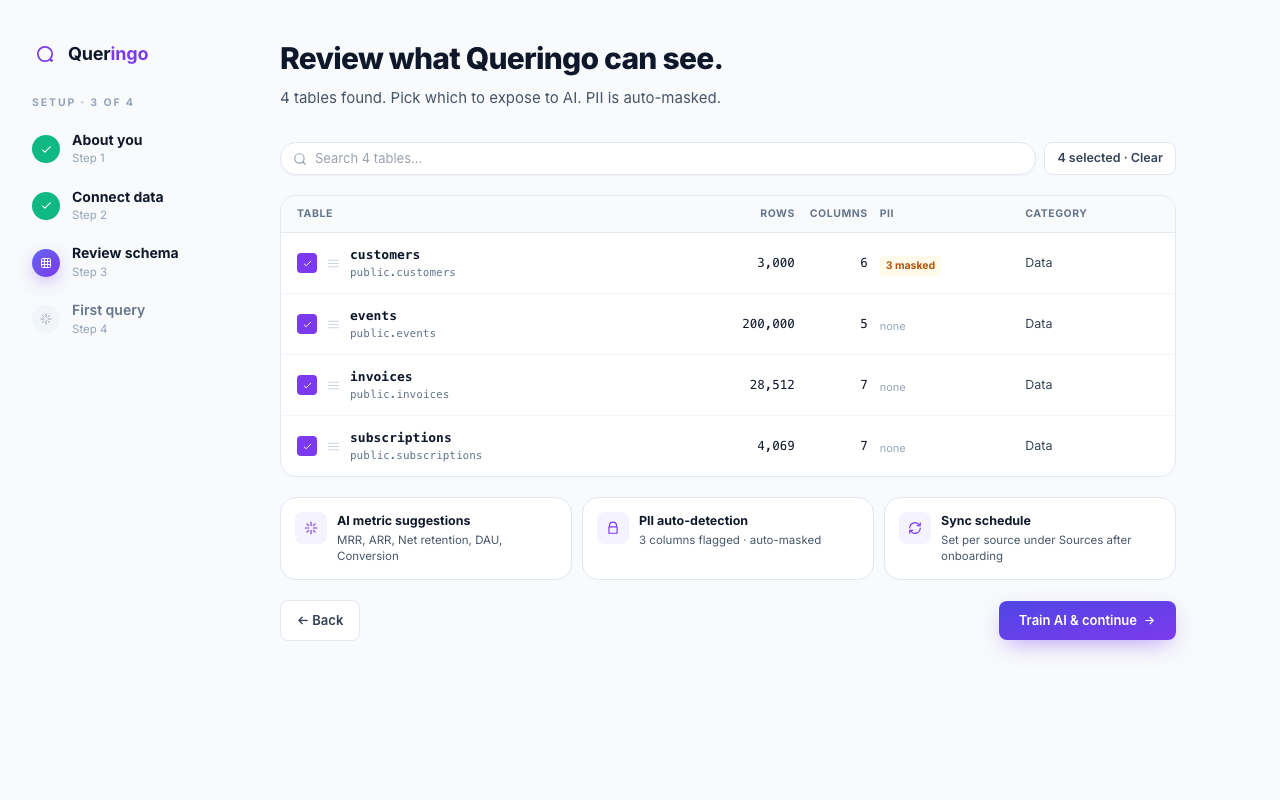
After a source connects, Queringo introspects it and shows what it found: tables, row and column counts, and any columns it flagged as personal or financial data. You decide what the AI can use.
Steps
- Wait for discovery to finish
Discovery runs in the background and usually takes a few seconds. The header updates to show how many tables were found.
- Review the tables
Each row shows the table name, schema, row count, column count, a PII indicator, and a category. Use search to filter long lists.
- Choose what to expose
Everything is selected by default. Clear tables you do not want the AI to query, or use Select all / Clear to toggle in bulk.
- Confirm
Choose Train AI & continue to save your selection and move on.
PII and financial columns
Columns detected as personal or financial data are flagged and auto-masked in results by default, so sensitive values are protected even while you query. You can refine these later under Settings, PII & financial.
Not sure about a table? Leave it selected. You can always change which tables are exposed later from Sources.
What's next
Continue to Run your first query.