Invite your team
Add teammates to your workspace and control what each can do.
Queringo is better with your team. Invite members so they can ask questions, build dashboards, and share findings. You control access with roles and permission groups, and each seat counts toward your plan.
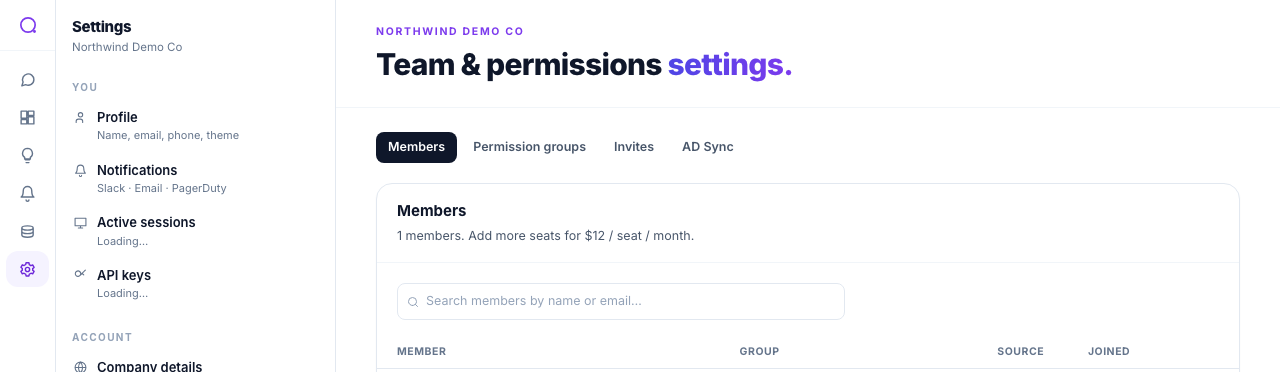
Steps
- Open Team & permissions
In the app, go to Settings, then Team & permissions.
- Invite by email
Add a teammate's work email and send the invite. They receive a link to join your workspace.
- Choose a permission group
Assign a role so the member gets the right access from the start. You can change it later.
- Track seats
The header shows seats used against what your plan includes. Adding members beyond your included seats may require expanding your plan.
Roles at a glance
| Role | What they can do |
|---|---|
| Admin | Full workspace access: members, data sources, security, and billing visibility. |
| Member | Query data, build dashboards and alerts, and view shared resources. |
| Custom group | A permission group you define for finer-grained access. |
Tabs on this page
- Members: view and manage who is in the workspace.
- Permission groups: create and edit custom roles.
- Invites: track pending invitations (account admins).
- AD Sync: provision members automatically via SCIM on enterprise plans.
Invited teammates skip the company and data-setup onboarding steps, since the workspace already has data. They go straight to their profile and the app.
What's next
Once your team is in, point them at the Quickstart so they can ask their first question.