Set up your profile
Tell Queringo about you and your company so the AI recommends the right metrics.
The profile step trains the AI on your domain and personalizes the metrics and insights it suggests. The account creator fills in company details too; invited members only set their own profile.
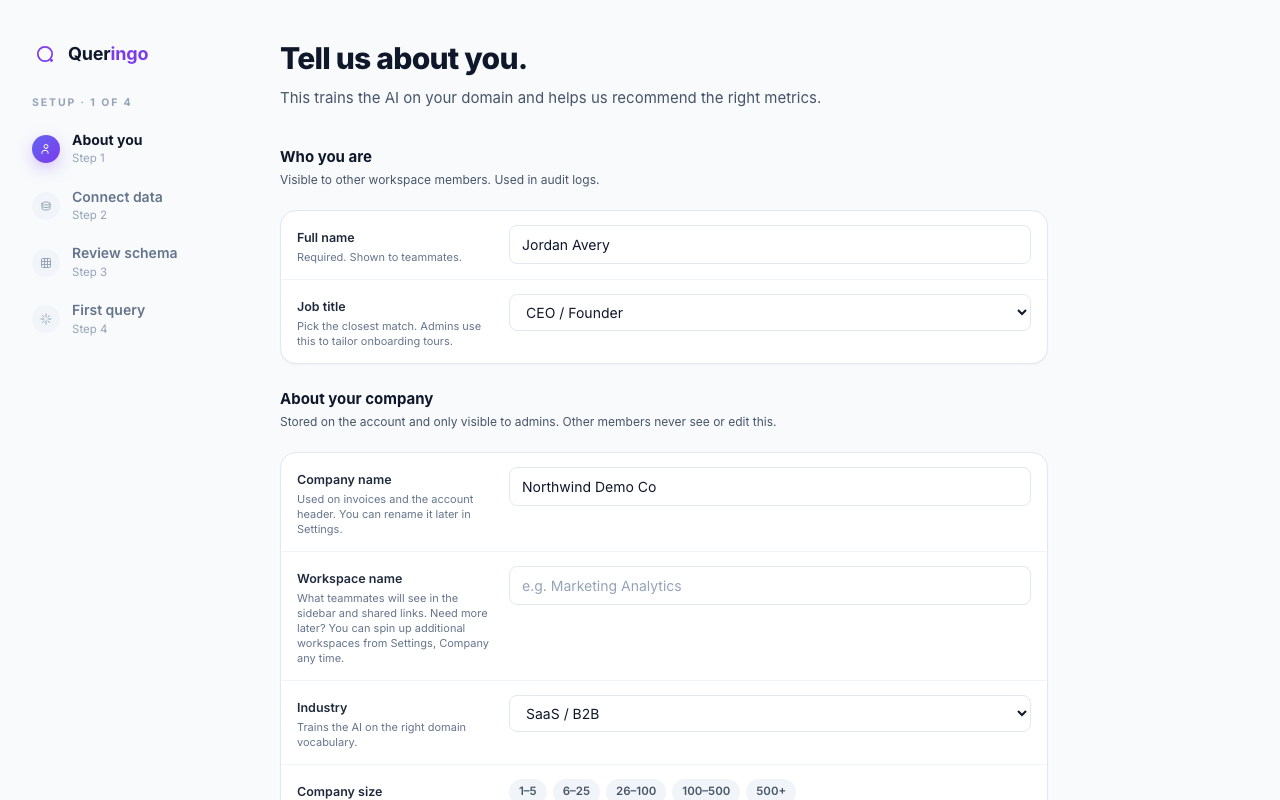
Steps
- Who you are
Enter your full name and job title. These are visible to teammates and used in mentions and audit logs.
- About your company
The account creator sets the company name, workspace name, industry, and company size. Industry trains the AI on the right vocabulary. Invited members do not see this section.
- Pick your focus areas
Choose the use cases you care about (sales, product, finance, and so on). These personalize insight and dashboard suggestions and can change any time.
- Add a phone number (optional)
Optionally add an SMS-verified phone number for security alerts and, on the top plan, critical alert paging. We text a 6-digit code to confirm it.
Options reference
| Field | Who sets it | Used for |
|---|---|---|
| Full name, job title | Everyone | Display, mentions, audit logs |
| Company, workspace name, industry, size | Account creator | Billing, AI domain vocabulary |
| Focus areas | Everyone | Personalized suggestions |
| Phone number | Everyone (optional) | Security and critical alerts |
Profile details are not final. You can change all of them later under Settings, Profile.
What's next
After saving, you continue to Connect a data source (or straight to the app if your workspace already has data).