Connect a data source
Wire up a database or load the sample warehouse during onboarding.
This step connects the data Queringo will answer questions about. You can wire up your own database or load a ready-made sample warehouse to explore first.
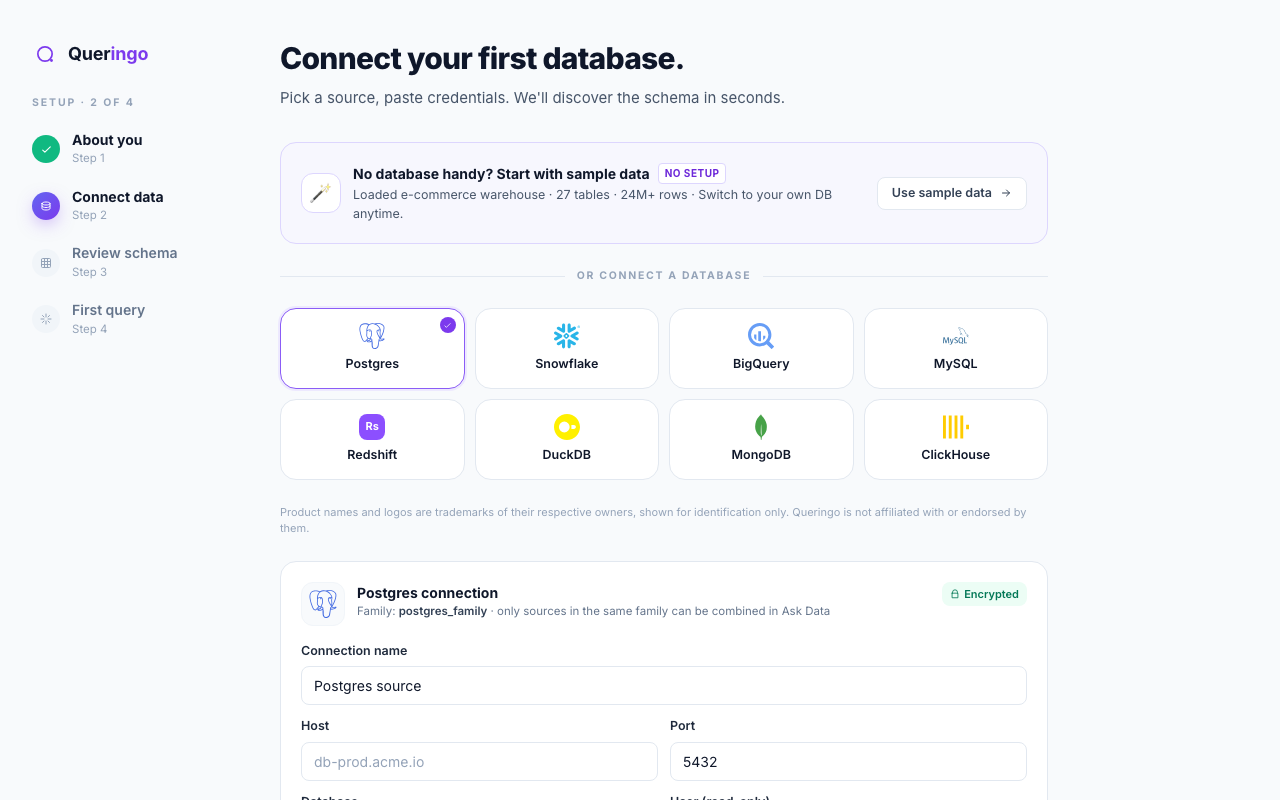
Option A: load sample data
The fastest path. Choose Use sample data to load a demo e-commerce warehouse (27 tables, millions of rows). Your trial does not start, and you can switch to your own database later.
Option B: connect your own database
- Pick a source
Select your database from the grid (Postgres, Snowflake, BigQuery, MySQL, Redshift, DuckDB, MongoDB, ClickHouse).
- Enter credentials
Fill in host, port, database, and a read-only user. Enable SSL if required, or set up an SSH tunnel for a private network.
- Test the connection
Choose Test connection. Queringo verifies it can reach and authenticate against the database before saving.
- Discover the schema
On success, Queringo persists the source and discovers its schema, then takes you to the review step.
Connect with a least-privilege, read-only account. Queringo never needs write access.
What's next
Continue to Schema discovery. For a deeper per-connector reference, see Connect your first database.