Shopify
Connect Shopify to Queringo. Setup, fields, testing, editing, and alternatives.
Orders, products, and customers.
At a glance
| Category | SaaS |
| Auth | Access token (recommended), or one-click connect |
| Plan | Growth and above |
Setup
The recommended way to connect Shopify is with an Admin API access token from a custom app in your store. This gives Queringo full order history and customer-level analysis right away. A faster one-click option is also available, with some limits described below.
- Open Connect source
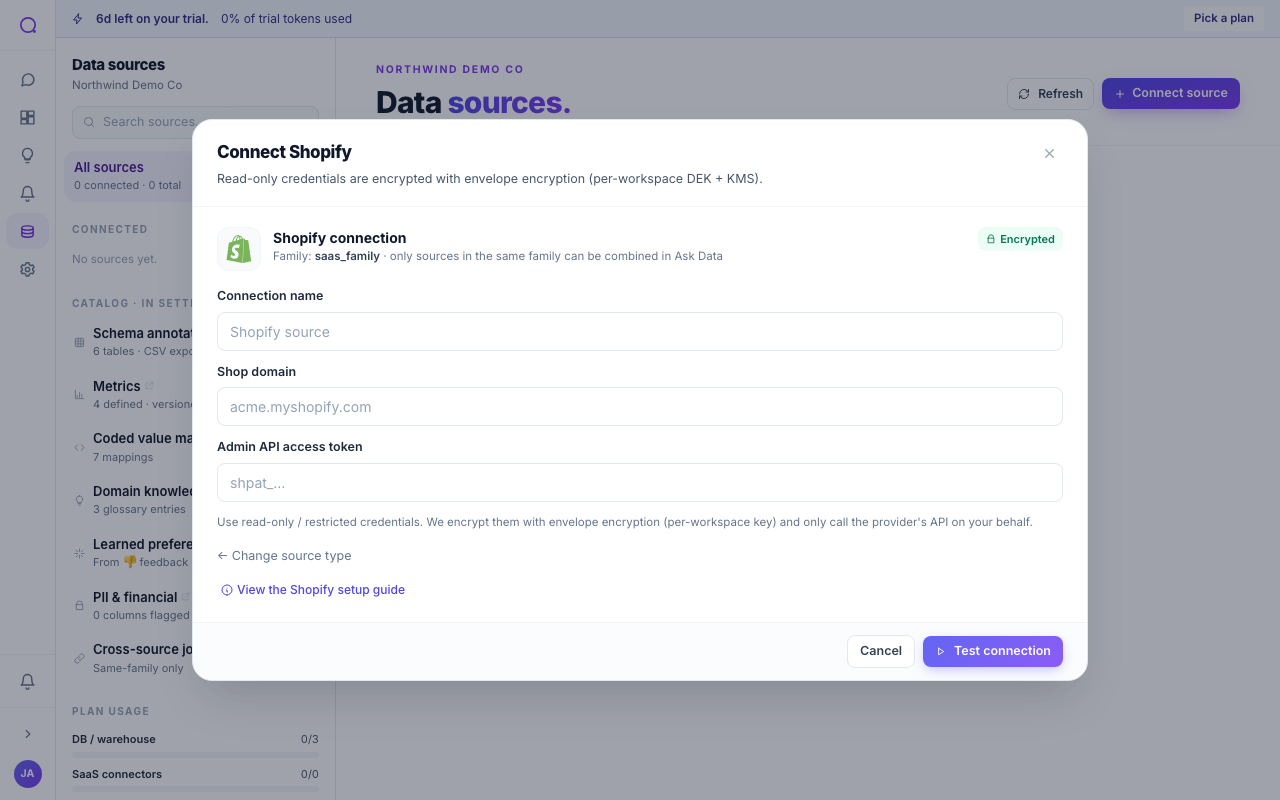
In the app, go to Data sources and choose Connect source. Open the SaaS tab and select Shopify.
- Paste your credentials
In the Shopify connection form, paste:
- Shop domain: Your
*.myshopify.comaddress, e.g. acme.myshopify.com. - Admin API access token: Token from a custom app installed on your store, starts with shpat_.
- Shop domain: Your
- Save the connection
Queringo tests the connection before saving, then discovers the schema. PII is flagged and masked by default during discovery.
Fields
| Field | What to paste |
|---|---|
| Shop domain | Your *.myshopify.com address, e.g. acme.myshopify.com. |
| Admin API access token | Token from a custom app installed on your store, starts with shpat_. |
Where to find these in your provider
- In Shopify admin, open Settings → Apps and sales channels.
- Choose Develop apps and create a custom app for Queringo.
- In Configure Admin API scopes, grant the read scopes you need (Orders, Products, Customers, Inventory, Reports).
- Install the app on your store, then open API credentials and reveal the Admin API access token (starts with
shpat_). - Your Shop domain is the
*.myshopify.comURL shown at the top of your Shopify admin.
One-click connect (optional)
If you would rather not create a token, choose Connect with Shopify in the connection form. You enter your store domain, approve access in your Shopify admin, and are returned to Queringo already connected.
While our extended access is in review with Shopify, one-click connect reads only the last 60 days of orders, and customer names and emails are limited. For full order history and customer-level analysis, use the access token method above. The form shows the current limits before you continue.
Deep analysis
When you connect a Shopify source, Queringo offers to turn on deep analysis. This keeps a securely encrypted copy of your store's data so questions about trends, cohorts, and joins across many rows answer quickly. It is off by default, you can turn it on during setup or later from the source, and turning it off deletes the copy. See Deep analysis for how the copy is stored and removed.
Test the connection
Queringo runs a connection test as part of saving. If it fails, the error message indicates what to check (credentials, network reachability, or scope). From Data sources, you can re-run Test connection on the source row any time, for example after rotating a secret or changing network rules.
Edit or rotate
To change connection details, open the source from Data sources and edit it. To swap only the secret (the access token), use Rotate credentials so existing dashboards and alerts keep working. For a one-click connection, choose Reconnect to authorize with Shopify again. See Rotating credentials.
Reference
Suggest a different connector
Don't see what you need? In the Connect a data source picker, choose Request it. Queringo bundles votes from every workspace asking for the same one and prioritizes accordingly.
Related connectors
What's next
For the category overview and shared options, see SaaS. To keep sources healthy, see Managing sources.